Call Flow
Customer contacts us (call/email/voicemail) requesting to file a claim.
- Customer will have filled out the NOL (Safeware).
- You will fill out NOL with the customer while on the phone.
- Call back to customer to get more info for the NOL.
- Assign to claim creation pending.
- Connect to Safeware VPN.
- Create SIMS Claim.
SIMS Claim Creation
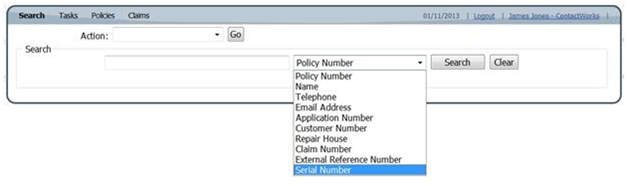
1. Log into SIMS with your assigned Username and Password.

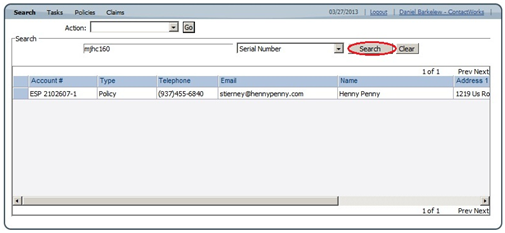
2. Search SIMS using the serial number provided for the device on the NOL.
3. Once the search results return a Policy entry for that device you will double click on the Account Number to open that policy. The window that opens will be a detailed view of the Policy.
4. Click the underwriting tab within the claim window. Within the underwriting tab will be a box that lists the deductible amount and any limits to the claim. Almost all will have a $0 deductible amount but it is important to take note of any amount listed in the claim for use further in the claim flow.

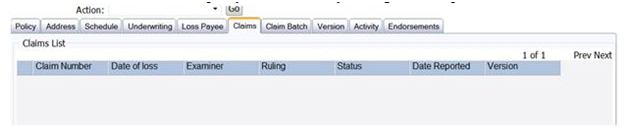
5. Click on the claims tab (Now the Service Event tab) within the policy and look for any existing claims. If prior claims are listed make sure that you check the remaining ESP balance in order to it still falls within coverage.
6. In order to start a new claim you will need to select new claim from the drop down Action list.
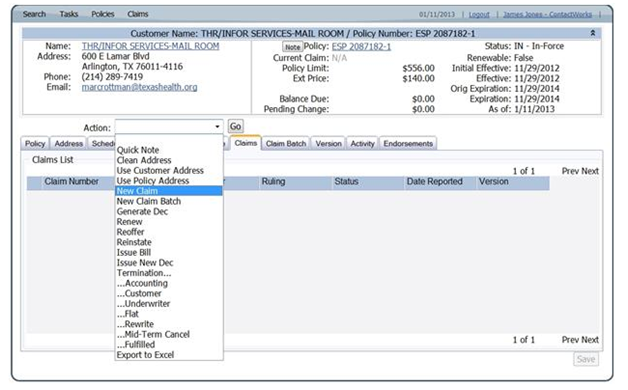
7. Once you have selected new claim from the action drop down list, a window will open enabling you to fill out a new claim with the information provided by the Customer in the NOL.
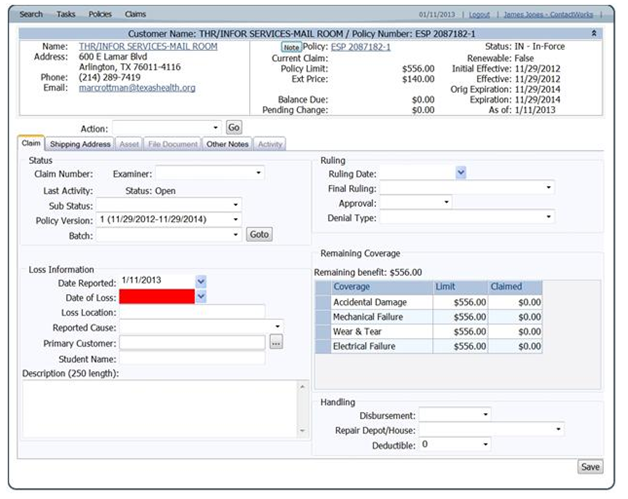
8. Under the Status section on the new claim form you will select NEW in the sub status drop down, You will need to select your name from the Examiner drop down as well. Once that has been completed you will move to the Loss Information section and fill out the fields with information provided on the NOL. Leave Primary Customer blank but make sure to give a solid description of the damage in the field provided.

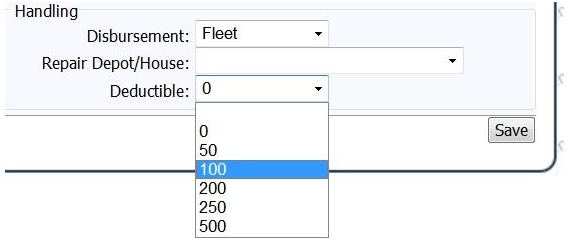
9. The next area that is required to file a claim is Handling. Select Fleet from the Disbursement drop down and select the correct deductible amount to match what was listed in the underwriting tab. Once that has been completed click save after reviewing the window for any errors.
10. Once the claim has been save you will need to click on the shipping tab within the claim window to update it with information from the NOL.
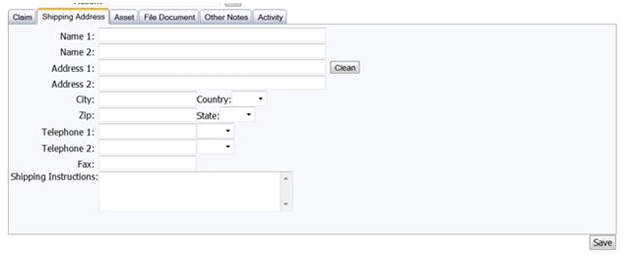
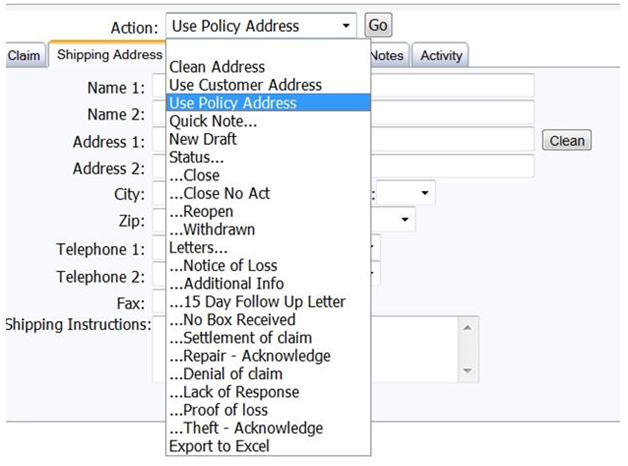
11. If the NOL shipping address is the same as the address listed at the top of the claims window you are able to select use Policy Address from the action drop down in order to populate the shipping fields. Click save once this tab as been filled out with the appropriate shipping information.
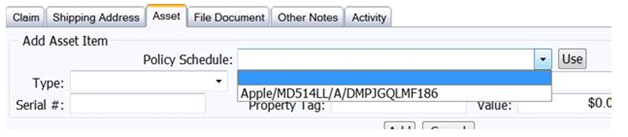
12. Next you will need to click on the Asset tab of the claim window for the next part of the claim creation. You will need to select the device serial from the Policy Schedule drop down menu and then click Use. The page should populate with the correct information of file for the device. Once the page has populated click add to add the device to the claim. The device should now be listed in the table at the bottom area of the asset tab. Click save once you have review for accuracy.
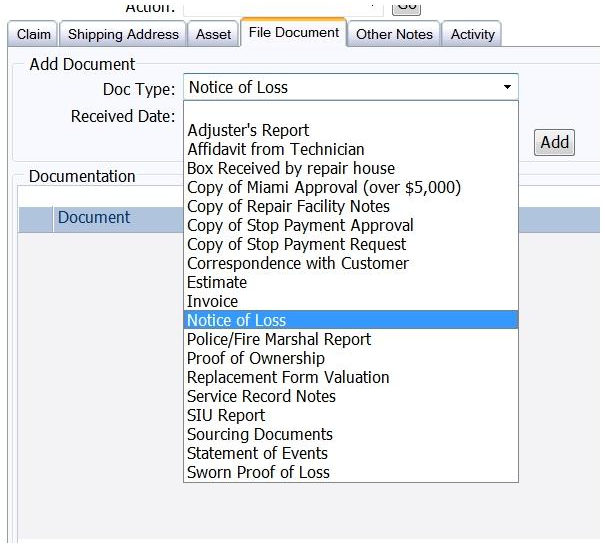
13. The next step of claim creation is to click on the File Document tab of the claim window. Select Notice of Loss from the Doc type drop down menu as well as the date received then click add.
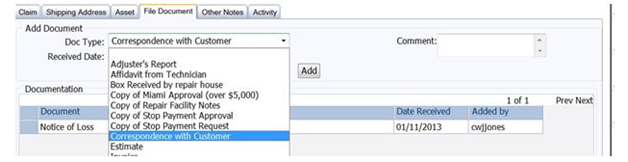
14. The file document tab is also the area within a claim that we will log any additional communication with the customer such as claim inquiry request. For these type of events select Correspondence with Customer from the Doc type drop down menu. Add any comments to the field available prior to clicking add. This will serve as a history of customer interactions and it is critical that it is completed. Click save once completed.
15. Once the claim has been completed before you are able to close out the ticket within Contact Works ticketing system you will need to send the completed NOL to [email protected] and CC [email protected]. Once that has been sent close the ticket in the Contact Works ticketing system.